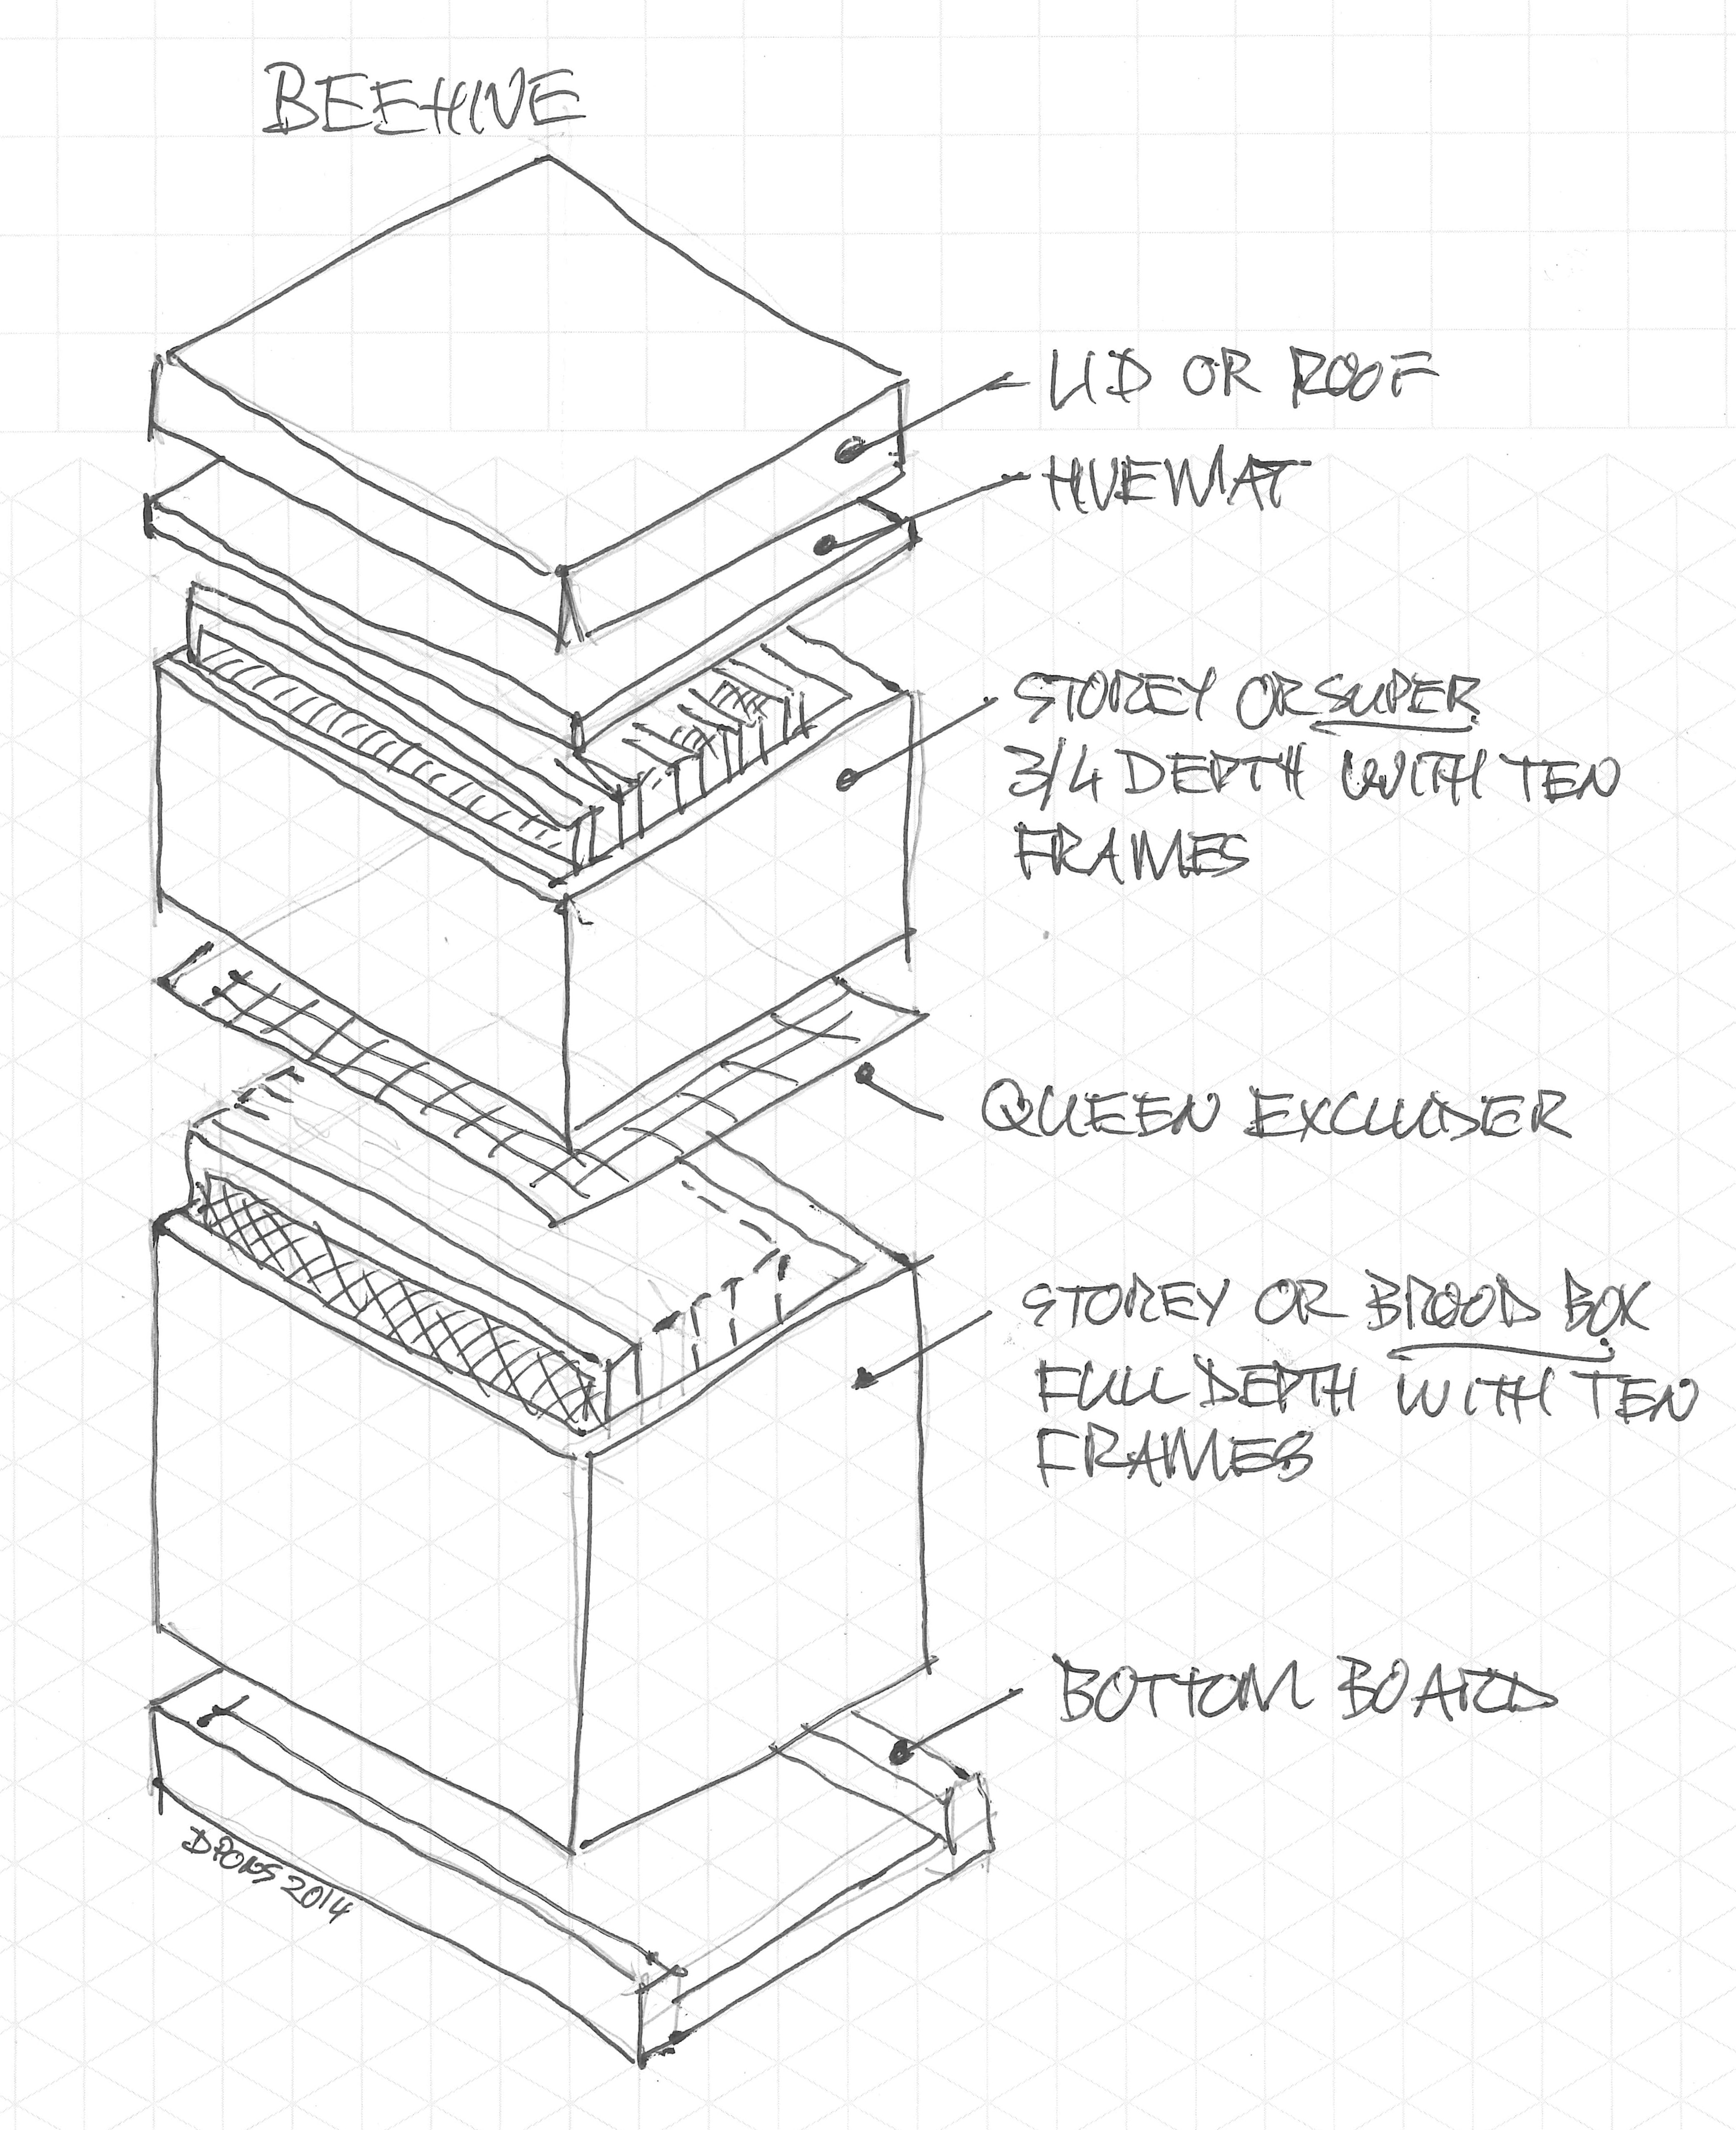
What is a Langstroth hive
The Langstroth hive was patented by Lorenzo Langstroth in 1852 and is based on a single principle: bee space. Bees leave gaps between 6 and 9 mm alone. Spaces smaller than 6 mm are filled with propolis; spaces larger than 9 mm are built out with comb. By designing all internal dimensions around a 9.5 mm gap, Langstroth created a hive whose frames can be removed without destroying the comb attached to them.
In Canada, the 10-frame deep Langstroth body is the most widely used configuration, though 8-frame mediums are gaining popularity among hobbyists who want lighter boxes.
Bee space
The critical measurement in any Langstroth hive is the 9.5 mm (3/8 in) gap between the frame top bars and the underside of the box above. Maintaining this gap throughout assembly prevents propolis build-up that makes inspections difficult.
Components and their function
Bottom board
The bottom board forms the floor of the hive. Solid bottom boards were standard for most of Langstroth's history, but screened bottom boards became common after research in the 1990s showed they reduce Varroa mite populations by allowing mites that fall off bees to drop through rather than re-attach. In colder Canadian provinces, many beekeepers use a solid bottom board through winter and switch to screened in summer, or use a screened board with a removable insert that closes the screen during winter months.
The bottom board also has an entrance reducer — a strip of wood or plastic that narrows the hive entrance. New colonies and overwintering hives generally benefit from a smaller entrance: it is easier for bees to defend against robbing, and a smaller opening reduces cold air drafts in winter.
Brood box (deep super)
The brood box is where the queen lays eggs and where the colony raises its young. Most Canadian setups use one or two deep brood boxes (also called hive bodies). A single 10-frame deep box gives a new colony enough room for early season build-up, but a second deep is typically added by late spring to prevent swarming and give the queen sufficient laying space for the summer nectar flow.
Two deeps allow a colony to store enough honey in the lower portion of the top brood box to survive a Canadian winter without the beekeeper needing to add honey supers — an advantage when managing winter weight without lifting heavy honey boxes in fall.
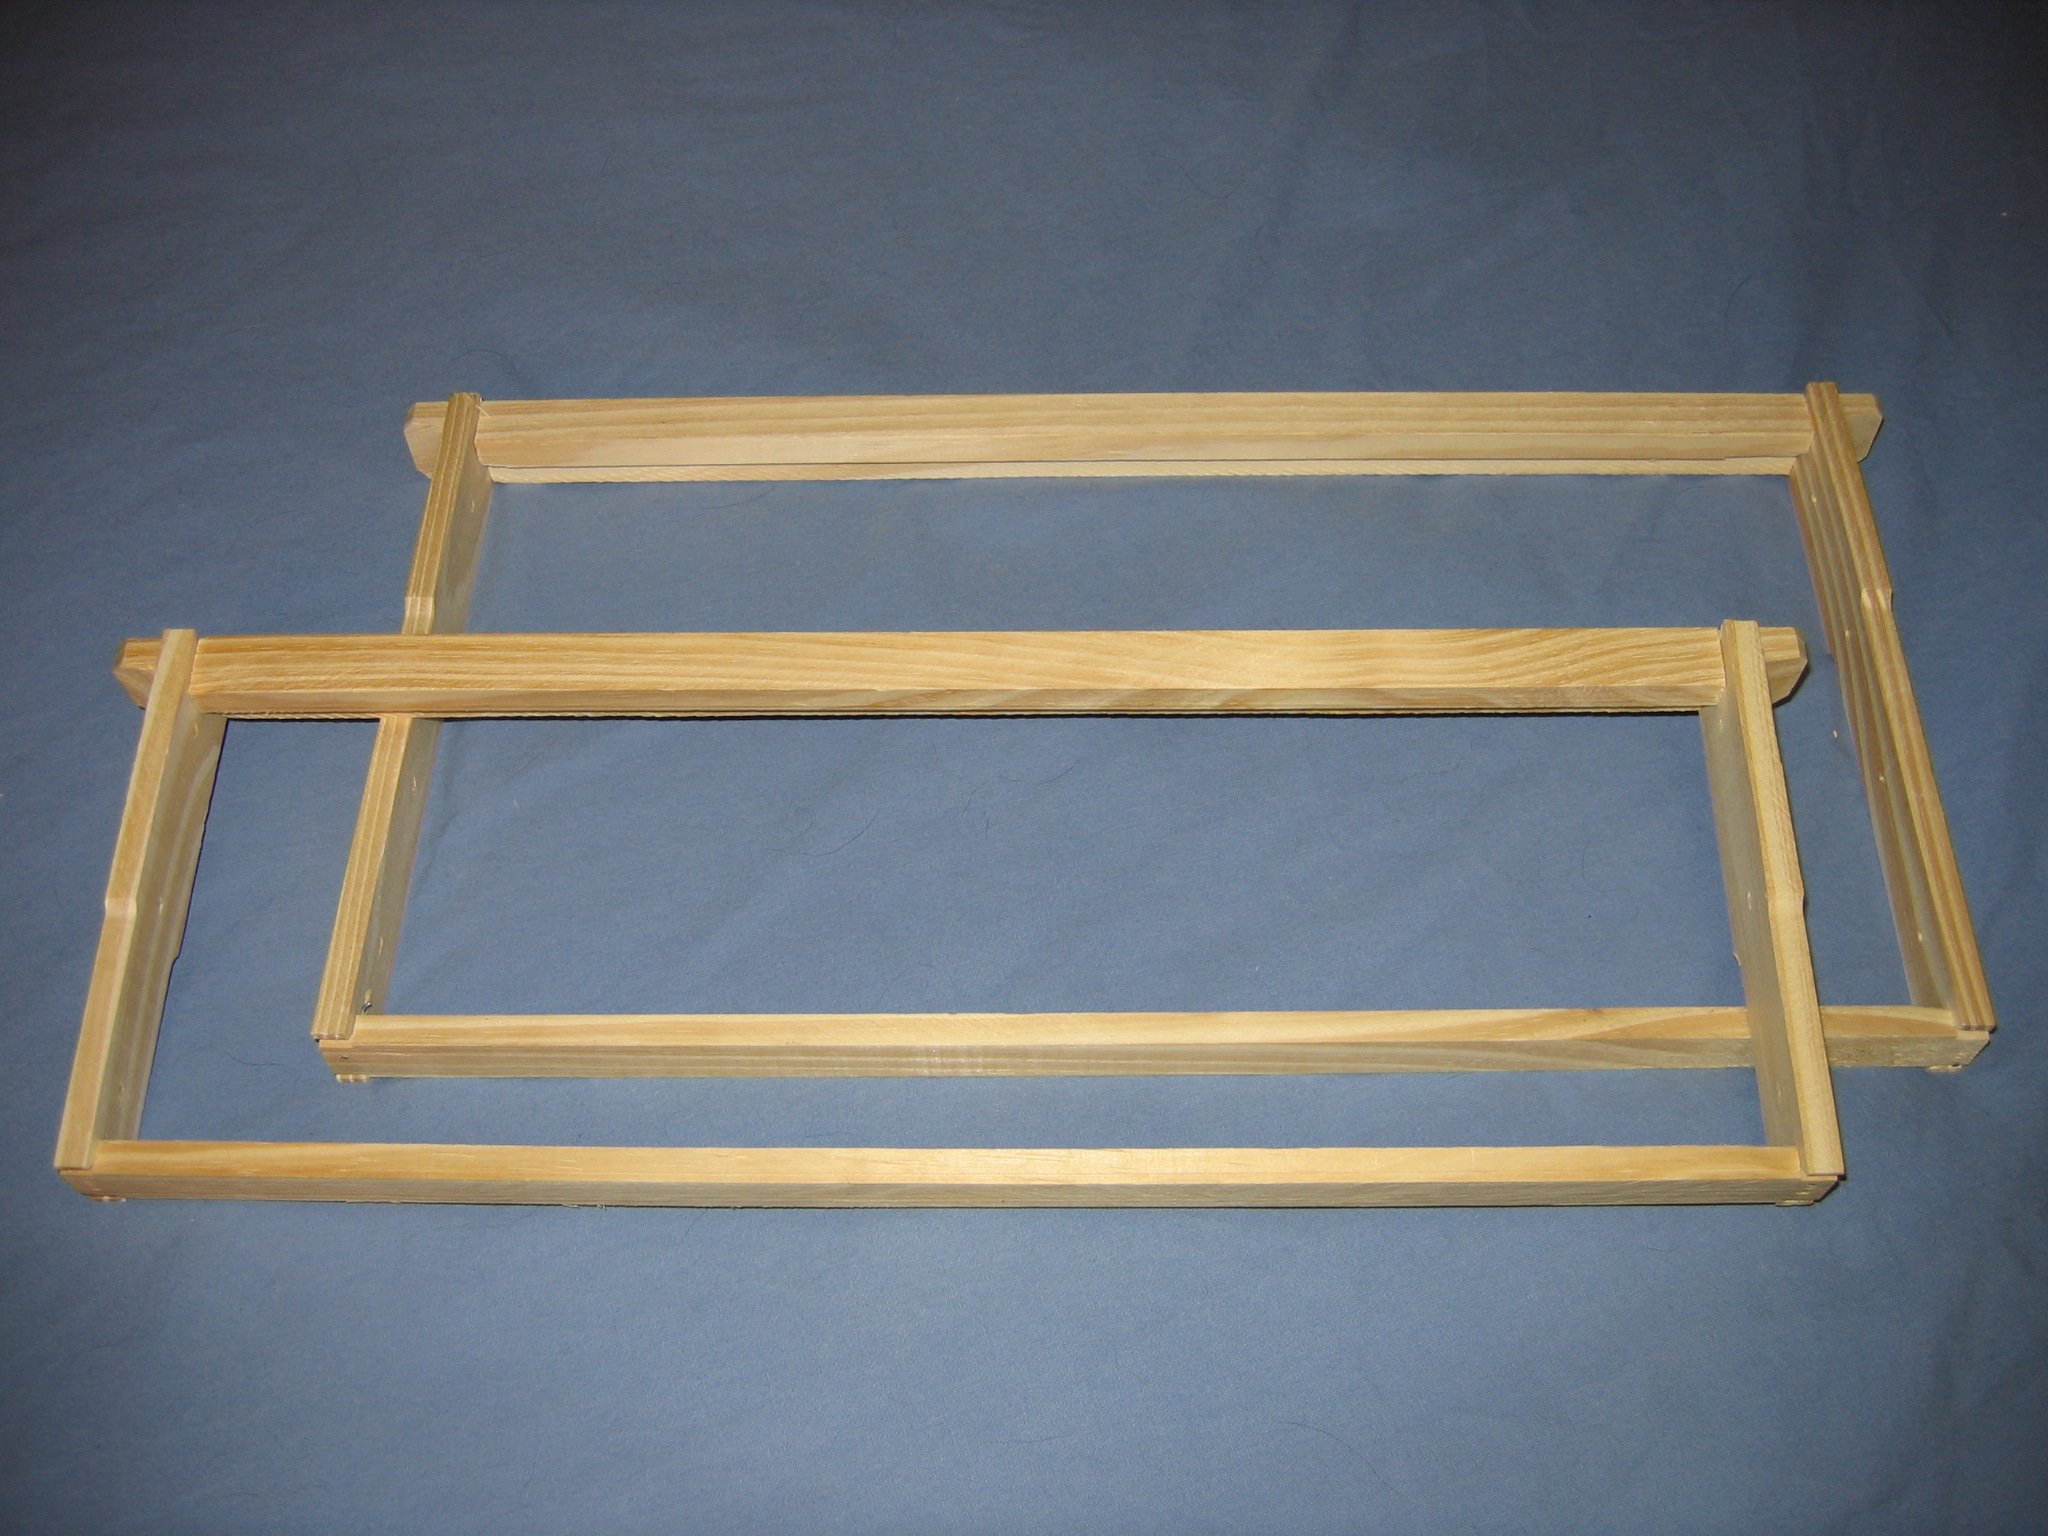
Frames
Frames hold the comb and slide into the box like files in a folder. Standard 10-frame deeps use frames that are approximately 19 mm shorter than the internal box width, leaving the 9.5 mm bee space on each side. Frames consist of a top bar, two side bars, and a bottom bar. Foundation — either beeswax-coated plastic sheet or pure beeswax on a wire grid — is set into the frame to guide the bees in drawing straight comb.
New frames should be assembled before the bees arrive. The wedge on the top bar is removed, the foundation is set in the groove of the bottom bar and pressed against the top bar, and the wedge is replaced and nailed flush. Some beekeepers also run wire through the side bars for additional support, particularly in honey supers where the weight of full comb is significant.
Queen excluder
A queen excluder is a flat grid placed between the brood box and the first honey super. Worker bees pass through the grid; the queen, being slightly wider, cannot. This keeps the brood and the honey stores in separate boxes. Not all beekeepers use excluders — some find they slow honey production slightly because workers are reluctant to cross the barrier — but they simplify extraction by keeping brood out of the honey supers.
Honey supers
Honey supers are shallower boxes placed above the brood area. They are added when the colony has drawn and filled at least 80% of the brood box frames. Adding a super too early reduces the colony's warmth; adding it too late triggers swarming. In most of Ontario and Quebec, the first super goes on in late May or early June, coinciding with the early summer nectar flows from clover and basswood.
Inner cover and outer cover
The inner cover sits directly on top of the uppermost super. It has a central hole that can serve as an upper entrance or ventilation port. In winter, a candy board or moisture quilt is sometimes placed between the inner cover and the outer cover to manage condensation — a significant cause of winter colony loss in Canadian conditions.
The outer cover is a telescoping lid that extends down over the sides of the box, protecting the inner cover and the hive below from rain and snow. It should be weighted or strapped down in any location with significant wind — which includes most exposed rural and suburban sites across Canada.
Assembly sequence
Hive components can be assembled in any order, but the following sequence minimises the chance of reassembly later:
- Assemble all frames and insert foundation before the bees arrive. Frames with drawn foundation are easier for a new colony to accept than bare frames.
- Set the hive stand or cinder blocks on level ground. A slight forward tilt (1–2°) allows rain water to drain from the bottom board entrance.
- Place the bottom board on the stand with the entrance facing away from prevailing winter winds — typically south or east in most Canadian locations.
- Set the first brood box on the bottom board. Check that it sits flush — a gap invites skunks and other predators that can harass a new colony.
- Install frames. A new package colony does best with 8 frames with drawn foundation centred in a 10-frame box, with empty frames on the outside edges removed until the colony expands.
- Install the inner cover with the flat side down and the raised rim facing up, creating the bee space between the inner cover and the outer cover.
- Set the outer cover on top and weight it.
Location notes for Canada
Hives placed in full sun warm up faster in spring and can be productive earlier in the season. In areas with cold, dry winters, a wind break on the north and west sides reduces heat loss from the cluster. Hives should be accessible year-round for winter checks — placing them at the back of a property that becomes inaccessible in deep snow is a common mistake among first-year beekeepers.
Materials and wood treatment
Hive bodies and covers are typically made from pine or fir. Untreated wood will last several years but benefits from exterior latex paint on the outside surfaces — not the inside. Paint extends the life of the wood by reducing moisture absorption through the walls. White and light colours are conventional (they reflect heat in summer) but any exterior-grade non-toxic paint is suitable. The inside of boxes should be left unfinished; bees coat interior surfaces with propolis and do not require a painted surface.
Cedar and cypress are naturally rot-resistant alternatives. Some commercial suppliers offer polystyrene hive bodies, which provide better insulation than wood but require more careful handling since bees can chew through them if left without activity for extended periods.
Sources
Information in this guide draws on publicly available resources including:
- Canadian Food Inspection Agency — Honey Bee Health
- Government of Ontario — Beekeeping in Ontario
- Image: Beehive layout, Wikimedia Commons (CC BY-SA 3.0)
Last updated: June 3, 2026